Skip to content

Tag: irises

Iris Painting Finished

Posted in Art Work, and Peeking Behind the Easel

Iris Painting Finished

It's finally finished! In a perfect world I'd paint from start to finish in a few days. That rarely happens when juggling  family commitments and I think it works in a weird way.  It's easy to be too critical when you are working up close on a painting.  A number of small break  between painting helps me see it with fresh eyes.  Things I thought were awful turn out to be just fine and having time to mull over the step helps move things along  when I pick up my paint brush.

I surprised a lot of you, my dear readers, with my choice of red for the irises. I have pushed the red to more of a maroon and I think you will love how it turned out.  I dug out an old hard copy photo of a maroon iris that at one time grew in my yard. I used this photo as a guide for the highlight and shadow colors.  If you look closely, you can see the shadows are a deep purple and the highlights in the sun show fuschia, oranges, and a little yellow.  Here's the scanned photo:
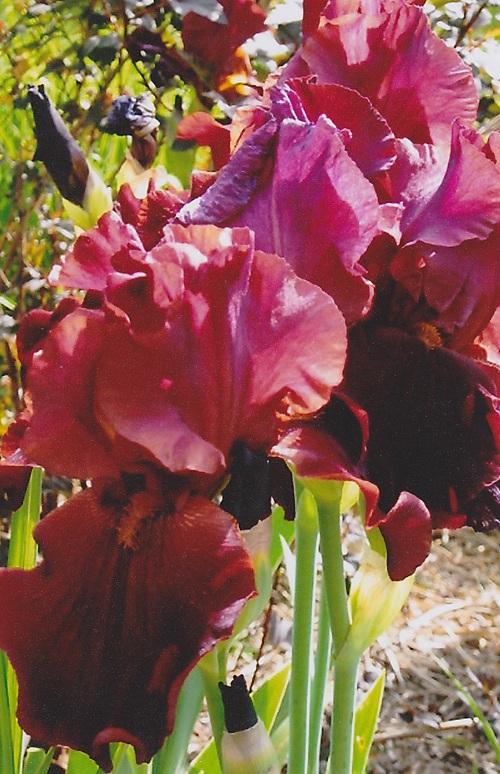
And finally – here's the finished painting!
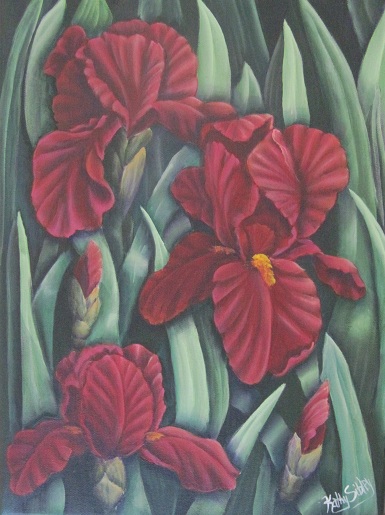
I am pleased with the finished painting. You'll will be able to find this on my Etsy shop over the weekend. Hope you enjoyed following along with this painting and the peek behind my easel!

If you missed the beginning of the painting -links to follow along with the painting:

http://www.sibstudio.com/starting-a-new-painting

http://www.sibstudio.com/iris-painting-update

Iris Painting Update

Posted in Art Work, and Peeking Behind the Easel

Iris Painting Update

The Iris painting is coming along.  The second step of painting after the background color, was to block in the shape of the irises with white gesso. That creates a clean white for the flower color to show up unaffected by the background color. When painting with acrylic paint, the mid tone colors are applied first, then I work towards the darks and back up to the lights. It is a different way of applying colors than oils or watercolors.

The leaves were based with a variety of light and dark greens, the combination of light and dark leaves create depth in the painting.   I chose a maroon red for the flowers because I love red and  I love the way the complimentary red  pops off of a green background.  I've started working towards the dark colors and shadows – take a peek

Meduim tones blocked in, and first shadows applied

Laying in the shadows on the irises help create the wrinkles and ruffles of the flower. The first layer of shadows on the leaves helps to define their depth and movement.  Stay tuned for the next update form behind my easel.

If you missed the beginning of the painting, you can see where it started from here:

http://www.sibstudio.com/starting-a-new-painting

Starting A New Painting

Posted in Art Work, and Peeking Behind the Easel

Starting A New Painting

I've started a new painting and thought you might like to follow along from start to finish.  The first thing I do after deciding what I want to paint is think about the composition and mull over colors. Sometimes, I'll sketch out an idea to help refine what I want to do.

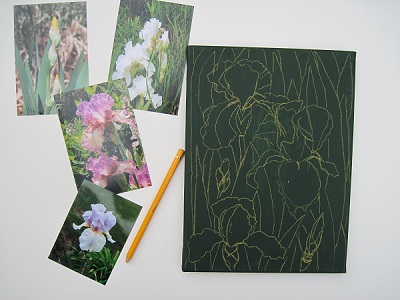
Once I have a mental picture of the painting, the next step is gather up the photos, sketches, and other reference material. These help me see the shapes of what I am painting.  Some artist project their references and trace the shapes. I haven't tried that –  I like the process of drawing out the picture. For this painting I am using photos I've taken of irises and relying on years of observing irises up close in my yard.

Yellow Iris

The next step is choosing the size canvas and base coating the background color. I like to paint the whole background to get rid of the white and to help balance colors and tones from the start.  I chose a dark green that will help create depth later in the painting.  After the base coat is dried, I begin sketching right on to the canvas.  I use a pastel pencil or chalk because I can wipe away it away with a wet towel.  This way I can redraw as much as I need to until the composition and the shapes are to my satisfaction.  Here's the start of the painting:

Start of painting on 9 x 12 canvas

Now comes the best parts – painting! Stayed tuned for the next step and a further peek behind my easel.  : )